Monday, January 18, 2010

Cocktail Hour: Bee's Knees

Here in Austin, Texas we seem to be experiencing a cocktail renaissance of sorts. Delicious, well-crafted specialty cocktails are popping up in bars all over, and I've been working to re-create our favorites at home.

One of my personal absolute favorites is the Bee's Knees, a delightful blend of honey, lemon juice and gin which can be found at the Good Knight (1300 East 6th Street, Austin). It's sweet, sour and totally refreshing. Although I think most folks might consider it more of a spring or summer drink, I think it's just the thing to brighten up the darker days of winter.


The New Bee's Knees (from Bon Appétit, via Epicurious)

Some notes: Dried lavender blossoms are available at health food stores, in bulk online - or if you're in town, I found mine at Central Market in the bulk foods area, right next to the teas.

I've taken to making larger quantities of the syrup of hot water, lavender blossoms and honey and storing it in a glass bottle in the fridge. That way, making a drink is as easy as adding some fresh lemon juice and gin to the syrup. Just keep the ratio of syrup to juice to gin handy - it's 3 syrup/2 juice/6 gin.

1/4 cup hot water
1 teaspoon dried lavender blossoms
1/4 cup honey
6 tablespoons gin
2 tablespoons lemon juice

Mix hot water and dried lavender blossoms in a bowl. Let steep 5 minutes. Whisk in the honey, and strain syrup into another bowl (or glass bottle).

Add 3 tablespoons of the honey syrup to the gin and lemon juice. Add to cocktail shaker with ice. Shake very well until frosty and strain into chilled glasses.

Sunday, March 1, 2009

Veggie Lasagna

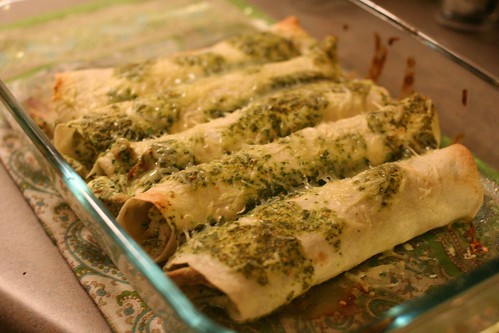
This is my favorite supper to make for the special vegetarians in my life. While it's not really a quick dish to throw together, it does generously feed 4 for dinner, and leave you with ample leftovers for lunch.

Like other casseroles, this is brilliant as a make-ahead mid-week dinner. Having friends over right after work? Know it'll be a late night at the office? Prepare your lasagna the night before, cover with foil, and put it in the fridge. Then when you get home, just take the lasagna out of the fridge and set it on the counter to warm a bit as the oven preheats. Then bake as directed.

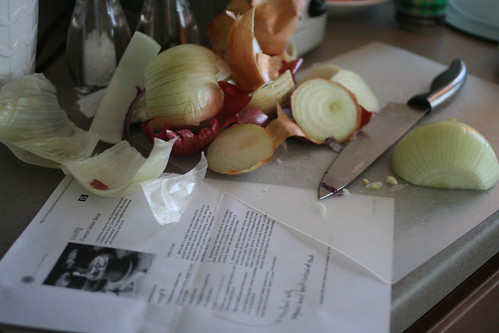
One of the things I love most about making lasagna is that it is easily adapted to your eating habits and whatever is in the fridge. You can grate zucchini or carrots, dice an onion or chop some garlic and add it along with the mushrooms to the olive oil in step 2. I often add ground beef or good sausage. (Edited to add: my husband points out that obviously if you are adding meat, you are no longer making veggie lasagna.) Feel free experiment. My rule of thumb is: if you're layering it with plenty of cheese, you don't have to worry about whether it will turn out tasty in the end. It will.


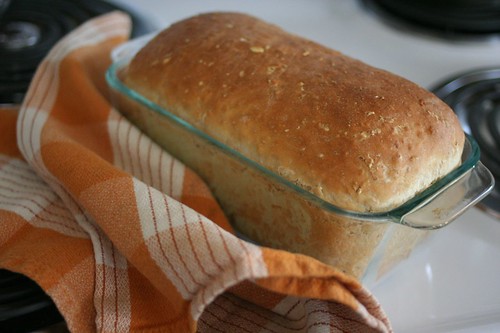
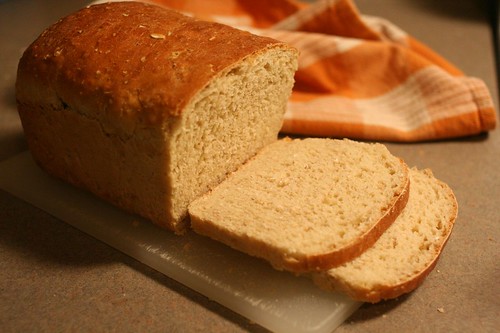
Veggie Lasagna with Mushrooms and Spinach
Delicious with fresh bread and a simple salad.
You'll need:
- Extra virgin olive oil
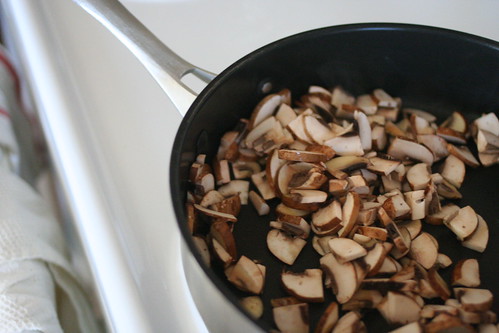
- 8-12 ounces of mushrooms (I prefer baby bellas)
- 4 cups marinara, either homemade or a good store-bought sauce (I am very loyal to Newman's Own Tomato & Basil sauce)
- 16 lasagna noodles (you may need fewer, but better to boil a few extra... it's very annoying to run out in the middle of putting the lasagna together)
- 2 - 15 ounce containers of part-skim ricotta cheese
- 1 large egg
- 1 1/2 teaspoon kosher salt
- 1/2 teaspoon fresh ground pepper
- Spinach (You can either use fresh or frozen. Honestly, you're baking it up in a lasagna, so unless you have some spinach that desperately needs to be used up, I generally go for frozen. If you're using frozen, take one box of chopped spinach and simply defrost it and then squeeze out the moisture. When I use fresh baby spinach, I use the full 6 ounce bag. Rinse the spinach, chop it, and then steam in a large skillet over medium heat, turning occasionally. Squeeze out excess moisture.)
- 3 cups grated mozzarella
- Oven, preheated to 400 degrees


1. Bring a large pot of water to a boil (throw in one or two big pinches of salt while heating the water) and add noodles and cook as instructed by box directions. Drain and rinse with cold water.
2. Make your mushroom sauce: Heat one or two glugs of olive oil in a large skillet over medium heat. Rinse mushrooms, cut out stems, and slice. When the oil is warm and fragrant, toss in your mushrooms and cook until well-browned. Add your marinara sauce, and reduce heat to low. Let the sauce simmer very lightly while you prepare the rest of your lasagna ingredients.
3. Make your cheese filling: Mix ricotta cheese, egg, kosher salt and pepper in a medium bowl. Add your well-squeezed spinach, and mix thoroughly.


4. Now that your ingredients are ready, it's time to layer. Take your lasagna dish and rub the inside lightly with olive oil. Put down one layer of noodles. They don't fit perfectly? Use your kitchen shears (or a knife) to trim them to size, remembering that this is a casserole and no one will notice if they're not perfect. On top of the first layer of noodles, add 1/2 of your mushroom/sauce mixture. Add another layer of noodles. Add 1/2 of your ricotta cheese mixture, followed by 1/2 of your mozzarella. Add another layer of noodles, the rest of the sauce, more noodles, the rest of the ricotta, and the remaining mozzarella. If you have some parmesan cheese hanging around your fridge, feel free to grate some over the top.
5. Cover your lasagna with tin foil.
6. Bake for 30 minutes covered. Remove foil, and bake 20-30 minutes more, until golden and bubbly. Remove from the oven, and cool for about 10 minutes before cutting so that it doesn't slide all over when you try to serve it.


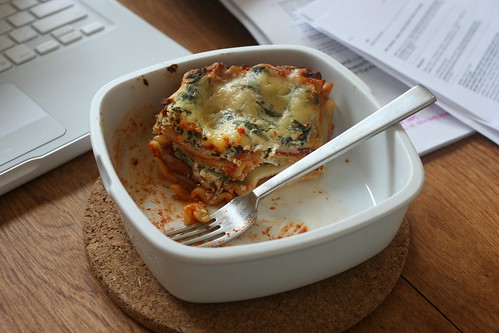
My share of the leftovers for lunch.

Sunday, February 22, 2009

French Onion Soup

I'm currently knee-deep in writing my master's thesis, which means one thing: I am very, very short on time (why does February have to be the shortest month?)

Given that constraint, I've been avoiding finicky recipes that use a lot of unusual ingredients. I'm more interested in recipes that come together very quickly with a few simple ingredients, or that take a while to cook but require very little fuss (and provide ample time between steps to write another paragraph).


This weekend, French Onion Soup was my answer. It's comforting, savory, easy and cheap. And I wrote a good couple of paragraphs while I let the onions cook down.

Since it is such a simple soup your ingredients really do matter, and so I recommend using a good organic stock or broth (I've had good luck with Pacific Foods Beef Broth).

French Onion Soup
Adapted from Martha Stewart Living
Serves 2-3

4 tablespoons butter
2 pounds onions (I like to use a blend of mostly yellow onions with one white, and one red thrown in for color and deeper flavor)
1 teaspoon sugar
1 tablespoon all-purpose flour
1/2 cup white wine (or, if you prefer, just omit this and add an additional 1/2 cup stock)
3 cups beef broth (or stock, if you have it)
3/4 teaspoon dried thyme
Stale baguette (next time you have a baguette getting stale on your counter, pop it in the freezer for such an occasion)
Gruyere, swiss or havarti cheese (several slices or about 6 oz. grated)

1. Melt butter in a large Dutch oven or a big, heavy pot on medium-low heat. Add onions. Sprinkle with the sugar, and cook (stirring just as needed to keep onions from sticking) until they are melting and soft, golden brown, and beginning to caramelize. (Usually between 30 minutes and an hour)
2. Sprinkle flour over onions, stir to coat. Add wine (if you're using it), stock and thyme, and bring to a nice light simmer.
Cook, partially covered, for about 30 minutes. Season with salt and pepper to taste.
3. I don't have bowls that are safe to put under the broiler, so here's my method for putting the bread and cheese on top: Cover a baking sheet with aluminum foil. Slice bread into 1/4" rounds, and top with cheese. Toast lightly under broiler until cheese is bubbly and brown around the edges. Ladle hot soup into bowls. Top each bowl of soup with several bread/cheese rounds. If you have broiler-safe bowls, you can ladle the soup in, top with bread and cheese, and put directly under the broiler until bubbly and brown.
4. Enjoy!


Tuesday, December 16, 2008

Oatmeal Bread

I really love baking, but for years I've outright dismissed any recipe that uses yeast. As soon as I saw it on the ingredient list, I turned the page. Yeast seemed intimidating and unpredictable, and I feared brick-like bread or hockey puck cinnamon rolls.

But today was very, very cold here in Texas, and it only seemed right to bake bread.

Oatmeal Bread

I'm glad I did. This recipe is nothing to fear. It's very, very easy and bakes beautifully. If it is cold in your house like it is in mine, you'll probably need to let it rise longer after shaping it and putting it in the pan in order to get it above the rim of the loaf pan. It's worth the time, though - this stuff is terrific warm from the oven with a little butter, or as toast with your tea.

Oatmeal Bread

3 cups Unbleached Bread Flour
1 cup rolled oats (old-fashioned oats)
2 tablespoons butter, melted
1 1/2 teaspoons salt
3 tablespoons brown sugar or honey (I used 2 tablespoons brown sugar and 1 tablespoon honey)
2 teaspoons instant yeast OR 1 packet active dry yeast*
1 1/4 cups warm (but not boiling!) milk

*If you use active dry yeast, dissolve it in the warm milk before combining with the remaining ingredients.

In a large mixing bowl, or in the bowl of an electric mixer, combine all of the ingredients, mixing to form a shaggy dough. Knead dough, by hand (10 minutes) or by machine (5 minutes) till it's smooth. Place dough in a lightly greased bowl, cover and allow it to rest for 1 hour; it'll become quite puffy, though it may not double in bulk.

Transfer the dough to a lightly oiled surface, and shape it into a log. Place the log in a lightly greased 9 x 5-inch loaf pan, cover the pan (with lightly greased plastic wrap), and allow the dough to rise for 45 minutes to 1 hour, till it's crested 1 to 2 inches over the rim of the pan.

Bake the bread in a preheated 350°F oven for 35 to 40 minutes, until an instant-read thermometer inserted into the center registers 190°F. If the bread appears to be browning too quickly, tent it with aluminum foil for the final 10 minutes of baking.


Enchiladas Verde

This is a recipe I first made after our first visit to Austin. We'd returned to Cleveland, Ohio, where we were living at the time, and I was craving enchiladas and tacos like crazy.

These enchiladas are not necessarily authentic tex-mex, but they are mighty tasty. And easy. You can even make them the night before, and then when you get home from work, just pull them out of the fridge to warm a bit while you preheat the oven. Then bake as usual. They're also great re-heated for lunch the second day. And they're from Cooking Light, so go ahead and eat that third one.


Chicken Enchiladas with Salsa Verde
adapted from Cooking Light

Serves 4... or 2 for dinner, with leftovers for lunch

1 cup chopped onion
1/4 cup chopped fresh cilantro (I'm a big fan of cilantro, and usually add twice this amount)
2 garlic cloves, minced
1 (7-ounce) bottle salsa verde (I usually use Herdez brand)
2 cups shredded cooked chicken breast - use leftovers from a chicken roast, or pick up a rotisserie chicken from the grocery
1/3 cup (3 ounces) less-fat cream cheese, softened
8 (6-inch) corn or flour tortillas
1/4 cup (1 ounce) crumbled queso fresco or mexican blend cheese
1/2 teaspoon chili powder
4 lime wedges

Preheat oven to 425°.

Combine first onion, cilantro, garlic and salsa verde in a blender or food processor; process until smooth. Combine chicken and cream cheese in a large bowl. Stir in 1/2 cup salsa mixture. Set the rest of the salsa aside.

Coat a 11 x 7 inch baking dish with cooking spray.

If you're not working with fresh and soft tortillas, microwave them in a slightly damp paper towel until warm and soft. Spoon about 1/4 cup chicken mixture down center of tortilla and roll it up. Place tortilla, seam-side down, in baking dish.

Pour remaining salsa mixture over enchiladas; sprinkle evenly with cheese and chili powder. Bake at 425° for 18 minutes or until thoroughly heated. Serve with lime wedges.

I usually also serve rice and beans on the side.

Thursday, December 11, 2008

Rigatoni with roasted pumpkin and goat cheese

Because I'm thrifty, I like to make sure that all the ingredients on my weekly shopping list get used up entirely. That usually means that I try to plan piggy-back recipes... leftover roast chicken becomes enchiladas verde, and extra goat cheese from a mushroom tart gets used in rigatoni with roasted pumpkin and goat cheese.

Now, you might have the same reaction that I did to this recipe. "Meg," you might say, "why the hell would I buy and peel a pumpkin just to make some pasta?"

I know. I know it sounds crazy. But it is super easy - even if you only own a cheap veggie peeler from Ikea that cost under a dollar (yes, that's me), you can peel a sugar pie pumpkin. It will be well worth the effort. This pasta is utterly delicious. It's luscious, sweet and tangy. It's worthy of guests, or of a special dinner for two.

And, as a total bonus, you can roast the seeds and toss them with kosher salt and have a lovely snack with beer while the rest of your dinner cooks, too.


Rigatoni with Roasted Pumpkin and Goat Cheese
from Everyday Food

1 medium sugar pumpkin (about 4 pounds), peeled, seeded, and cut into 2-inch chunks
4 shallots, peeled and quartered lengthwise
3 tablespoons olive oil
1/4 cup fresh sage leaves
Coarse salt and ground pepper
12 ounces rigatoni (or penne, or any other tube pasta with nooks and crannies for the sauce to sink in)
2 tablespoons butter
5 ounces fresh goat cheese, crumbled

Preheat oven to 450 degrees. Divide pumpkin, shallots, oil, and sage between two large rimmed baking sheets; season with salt and pepper, and toss.


Roast until pumpkin is tender, 30 to 35 minutes, tossing once and rotating sheets halfway through.


Meanwhile,in a large pot of boiling salted water, cook pasta until al dente. Reserve 1/2 cup pasta water; drain pasta, and return to pot. Add butter, cheese, and pasta water; toss until butter has melted.

Gently fold in roasted pumpkin; season with salt and pepper. Divide among serving bowls, and serve immediately.

Sunday, December 7, 2008

Mushroom Tart


If you like mushrooms, goat cheese, and puff pastry, then this, dear readers, is the dinner for you. Very savory and quite delicious. It'd also make an excellent appetizer cut into little bite-sized pieces.

I would recommend using parchment paper on your baking sheet beneath the puff pastry. And honestly, I didn't worry about making my tart a perfect rectangle. Free-form and rustic-looking is where it's at.

Mushroom Tart
from Martha Stewart's Everyday Food
Serves 4

1 (from a 17.3-ounce package) sheet frozen puff pastry, thawed according to package instructions
1 medium onion, halved and thinly sliced
2 tablespoons olive oil
Coarse salt and ground pepper
2 packages (10 ounces each) mushrooms, trimmed and thinly sliced - I used a combination of white mushrooms and baby bellas, and we enjoyed the combination
1 packages (10 ounces) fresh baby spinach
2 ounces soft goat cheese, crumbled

Preheat oven to 400 degrees. On a floured surface, roll the puff pastry out to a 16-by-10-inch rectangle. Place the pastry on a baking sheet. With a sharp knife, lightly score dough to form a 1-inch border. Using a fork, prick dough inside the border every 1/2 inch. Bake until golden, rotating pan once, about 15 minutes or until tender.

Meanwhile, in a small saucepan with a tight-fitting lid, toss onion with 1 tablespoon oil. Season with salt. Cover and cook over medium heat until onion begins to brown, about 5 minutes. Stir. Continue cooking with cover on for 15 minutes, stirring every 5 minutes. Set aside.


In a large saucepan with a tight-fitting lid, heat remaining oil. Add mushrooms; cover and cook until tender and all liquid has evaporated, about 10 minutes. Fold in spinach; season with salt and pepper. Cover and cook until wilted, about 5 minutes more. Drain any liquid.


Top dough with mushroom-spinach mixture. Scatter onion and goat cheese on top. Bake until cheese is lightly browned, about 15 minutes.